Why Cotton Candy Cheesecake Is a Must-Try Dessert
If you’re looking to delight your taste buds with something whimsical, colorful, and irresistibly creamy, Cotton Candy Cheesecake is the perfect dessert to try. This dreamy dessert combines the nostalgic sweetness of cotton candy with the rich, velvety texture of classic cheesecake, making it a standout treat for any celebration or a fun way to satisfy your sweet cravings. Whether you’re a cheesecake lover or just in search of a new, playful dessert experience, Cotton Candy Cheesecake promises a magical and unforgettable flavor adventure.
Why You’ll Love This Recipe
- A burst of nostalgic flavor: Cotton Candy Cheesecake captures the light, airy sweetness of cotton candy, bringing back those carefree carnival memories in every bite.
- Beautiful, vibrant colors: Its dreamy pastel pinks and blues make it visually stunning and Instagram-worthy for parties and special occasions.
- Creamy, smooth texture: The rich cheesecake base blends seamlessly with the fluffy cotton candy essence for a melt-in-your-mouth sensation.
- Easy to customize: This recipe can be tweaked to suit dietary needs or flavor preferences without losing its magical essence.
- Perfect for all occasions: Whether it’s a birthday, baby shower, or a cozy night in, this dessert will impress and satisfy everyone.
Ingredients You’ll Need
The ingredients for Cotton Candy Cheesecake are delightfully simple yet essential to create that perfect balance of flavor and texture. Each component plays a key role in delivering a creamy cheesecake layered with the sweet, airy charm of cotton candy.
- Cream cheese: Provides the rich and smooth base that every cheesecake needs for perfect creaminess.
- Sugar: Sweetens the dessert evenly, balancing the flavor without overpowering the cotton candy notes.
- Eggs: Help bind the cheesecake filling together for the perfect set and silky texture.
- Vanilla extract: Adds subtle depth and enhances the sweetness with its warm aroma.
- Whipped cream: Lightens the cheesecake, adding airiness to complement the cotton candy’s fluffiness.
- Cotton candy flavoring or cotton candy pieces: The star ingredient that infuses the cheesecake with that authentic carnival sweetness and whimsical feel.
- Graham cracker crust: A buttery, crunchy foundation that balances the creamy filling with just a hint of toasted flavor.
- Food coloring (optional): Pastel pinks, blues, or purples create the fun, magical look inspired by actual cotton candy.
Variations for Cotton Candy Cheesecake
One of the best parts about Cotton Candy Cheesecake is how easily it can be personalized. Whether you want to make it healthier, alter the flavor profile, or add some extra flair, these variations are easy and delicious.
- Vegan-friendly edition: Substitute cream cheese with dairy-free versions and use aquafaba or flaxseed eggs to keep it creamy and delicious.
- Fruit-infused twist: Add a swirl of fresh berry compote or strawberry puree to add a natural fruity acidity that pairs beautifully with sweetness.
- Chocolate lover’s version: Incorporate white chocolate chips or a drizzle of milk chocolate on top for an added layer of richness.
- Gluten-free crust: Use almond flour or gluten-free graham crackers for a crust suitable for gluten-sensitive guests.
- Extra crunchy topping: Sprinkle crushed candy pieces or candy sprinkles for a delightful texture contrast and colorful finish.

How to Make Cotton Candy Cheesecake
Step 1: Prepare the crust
Start by crushing your graham crackers into fine crumbs and mixing them with melted butter until you get a sandy, wet consistency. Press this mixture firmly into the bottom of your springform pan to form an even layer, then chill it in the fridge while you prepare the filling to allow it to set properly.
Step 2: Make the cream cheese filling
In a large mixing bowl, beat softened cream cheese until smooth and creamy. Gradually add in sugar, continuing to mix until fully combined. Then add eggs one at a time, beating well after each addition to ensure a silky texture. Stir in vanilla extract and your cotton candy flavoring or gently fold in small cotton candy pieces for bursts of sweetness.
Step 3: Add color and lightness
Mix in whipped cream carefully to lighten the batter, enabling the cheesecake to have that airy, fluffy characteristic. If desired, add a few drops of food coloring to create pastel hues reminiscent of classic cotton candy at the carnival.
Step 4: Bake and chill
Pour the filling over the chilled crust and bake in a preheated oven at a low temperature, around 325°F (160°C), for 45-50 minutes or until the edges are set but the center is slightly jiggly. Allow the cheesecake to cool completely, then refrigerate for at least 4 hours, or overnight, to firm up perfectly.
Step 5: Garnish and serve
Once chilled, decorate your Cotton Candy Cheesecake with extra cotton candy fluff, colorful sprinkles, or edible glitter to amplify the whimsical look before slicing and serving.
Pro Tips for Making Cotton Candy Cheesecake
- Room temperature ingredients: Ensure your cream cheese and eggs are at room temperature to avoid lumps and achieve a smooth batter.
- Don’t overmix: Mix just until ingredients combine to prevent incorporating excess air that can cause cracks during baking.
- Water bath method: Bake your cheesecake in a water bath to maintain even heat and prevent drying or cracking.
- Chill thoroughly: Give your cheesecake plenty of time to chill for the creamiest and firmest results.
- Cotton candy timing: Add cotton candy flavor or pieces last to keep the airy sweetness intact without dissolving too much during mixing or baking.
How to Serve Cotton Candy Cheesecake
Garnishes
Brighten your cheesecake with fluffy tufts of cotton candy perched on top, multicolored sprinkles, edible glitter, or pastel-colored frosting swirls for an eye-catching final touch that enhances both taste and appearance.
Side Dishes
Pair this sweet dessert with light fruit salads, a scoop of vanilla ice cream, or a refreshing mint tea to balance the richness and keep your palate delighted.
Creative Ways to Present
Serve it as mini cheesecake cups layered with cotton candy fluff, or on a dessert platter surrounded by candy dots and cotton candy tufts—perfect for parties and kid-friendly events where presentation thrills guests as much as flavor.
Make Ahead and Storage
Storing Leftovers
Wrap leftover cheesecake tightly in plastic wrap and store it in the refrigerator. It stays fresh for up to 4 days, allowing you to enjoy slices without losing any of the cotton candy magic.
Freezing
You can freeze Cotton Candy Cheesecake by wrapping it well and placing it in an airtight container. Freeze for up to 2 months, then thaw overnight in the refrigerator before serving. Keep in mind that freshly added cotton candy garnish is best added after thawing.
Reheating
Cotton Candy Cheesecake is best served chilled and typically does not require reheating. If desired, bring slices to room temperature for about 15 minutes before serving to enhance texture and flavor.
FAQs
What does Cotton Candy Cheesecake taste like?
This dessert combines the creamy, rich taste of classic cheesecake with the sweet, light, and airy flavor of cotton candy, producing a fun and nostalgic flavor that feels both indulgent and whimsical.
Is cotton candy flavor safe to bake with?
Yes! Cotton candy flavoring is typically food-grade and designed to hold up in baked goods, but it’s best to add real cotton candy pieces after baking to maintain texture and visual appeal.
Can I make Cotton Candy Cheesecake without a crust?
Absolutely! You can bake the cheesecake without a crust for a crustless cheesecake, or substitute the crust with crushed cookies or nut-based alternatives depending on your taste and dietary needs.
How long does Cotton Candy Cheesecake stay fresh?
Stored properly in the refrigerator, it remains fresh and delicious for about 3-4 days; beyond that, the flavor and texture may start to degrade.
Can I make Cotton Candy Cheesecake dairy-free?
Yes, by using plant-based cream cheese, coconut cream, and vegan gelatin substitutes, you can make a dairy-free version that’s just as creamy and flavorful.
Final Thoughts
Cotton Candy Cheesecake is a delightful treat that brings a playful yet sophisticated twist to traditional cheesecake. It’s perfect for adding a splash of color and nostalgia to any occasion, and its creamy texture paired with sweet cotton candy charm will win over friends and family alike. So go ahead, give this magical dessert a try and let each bite transport you to a world of sweetness and fun!
Related Posts
- Why Fried Strawberry Cheesecake Sandwiches Delight
- Which Homemade Peach Cobbler Recipe Is Best?
- Best Brownie Cookies Recipes to Satisfy Cravings
Cotton Candy Cheesecake

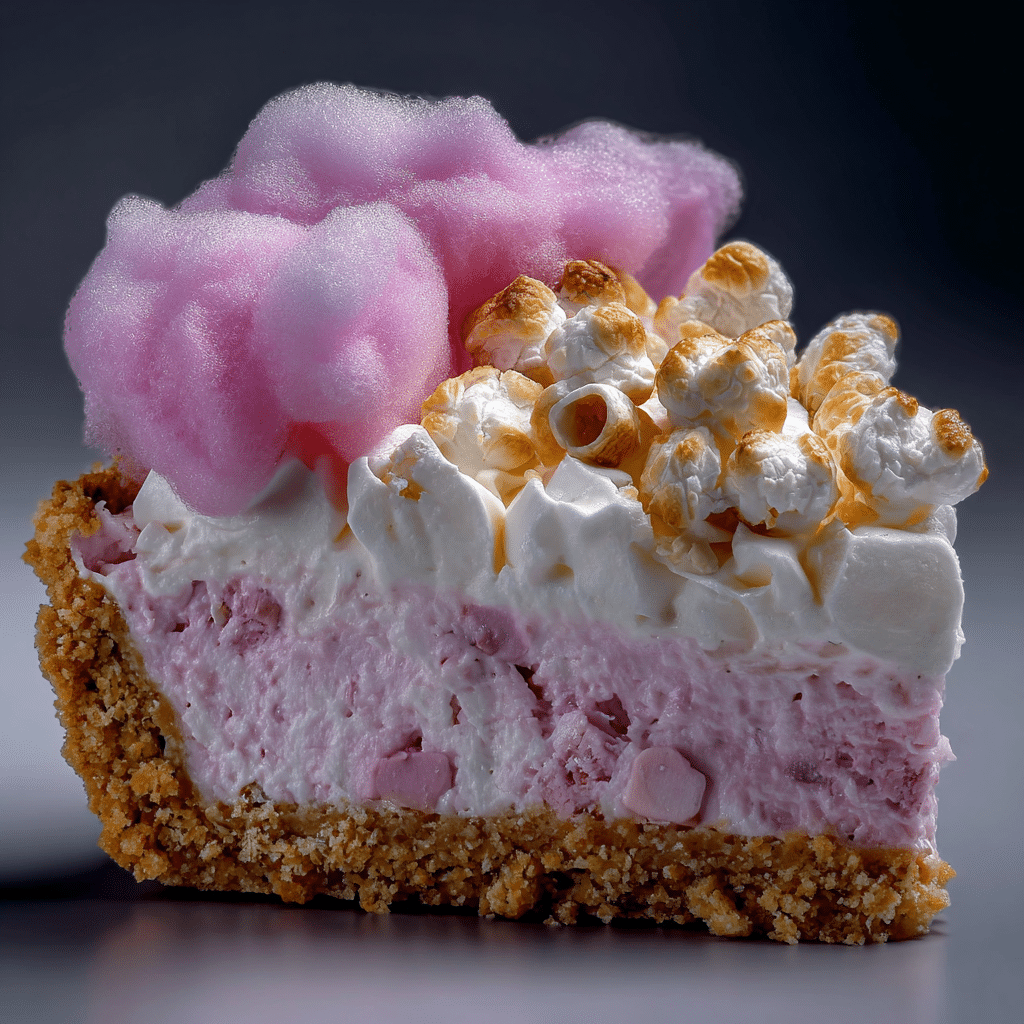
Cotton Candy Cheesecake is a whimsical and colorful dessert that combines the nostalgic sweetness of cotton candy with the rich, creamy texture of classic cheesecake. Perfect for celebrations or a playful sweet treat, this cheesecake features a buttery graham cracker crust and a fluffy, pastel-hued filling infused with cotton candy flavor. Easy to customize and visually stunning, it promises a magical and unforgettable flavor experience.
- Prep Time: 20 minutes
- Cook Time: 50 minutes
- Total Time: 5 hours 10 minutes (including chilling time)
- Yield: 8-10 servings 1x
- Category: Dessert
- Method: Baking
- Cuisine: American
- Diet: Can be made gluten-free and dairy-free with substitutions
Ingredients
Crust
- 1 1/2 cups graham cracker crumbs
- 6 tablespoons melted butter
Cheesecake Filling
- 24 oz (3 packages) cream cheese, softened
- 1 cup granulated sugar
- 3 large eggs, room temperature
- 1 teaspoon vanilla extract
- 1/2 cup whipped cream
- 1–2 teaspoons cotton candy flavoring or 1/2 cup small cotton candy pieces
- Food coloring (optional) – pastel pinks, blues, or purples
Instructions
- Prepare the crust: Crush graham crackers into fine crumbs and mix with melted butter until sandy and wet. Press the mixture firmly into the bottom of a springform pan to form an even layer. Chill in the refrigerator while preparing the filling to allow the crust to set properly.
- Make the cream cheese filling: Beat the softened cream cheese in a large bowl until smooth and creamy. Gradually add sugar, mixing until fully combined. Add eggs one at a time, beating well after each addition to ensure a silky texture. Stir in vanilla extract and cotton candy flavoring or gently fold in small cotton candy pieces for bursts of sweetness.
- Add color and lightness: Carefully fold in whipped cream to lighten the batter and create an airy texture. If desired, add a few drops of food coloring to achieve pastel cotton candy-inspired hues.
- Bake and chill: Pour the filling over the chilled crust. Bake in a preheated oven at 325°F (160°C) for 45-50 minutes until the edges are set but the center still slightly jiggles. Allow to cool completely, then refrigerate for at least 4 hours or overnight to firm up.
- Garnish and serve: Decorate the chilled cheesecake with cotton candy fluff, colorful sprinkles, or edible glitter to enhance its whimsical appearance before slicing and serving.
Notes
- Use room temperature cream cheese and eggs to ensure a smooth batter free of lumps.
- Mix ingredients just until combined to avoid cracking during baking.
- Baking in a water bath helps maintain even heat and prevents drying or cracking.
- Chill the cheesecake thoroughly to achieve a creamy and firm texture.
- Add cotton candy flavor or pieces last to retain the delicate airy sweetness and texture.
Nutrition
- Serving Size: 1 slice (1/10 of cheesecake)
- Calories: 350 kcal
- Sugar: 28 g
- Sodium: 250 mg
- Fat: 25 g
- Saturated Fat: 15 g
- Unsaturated Fat: 8 g
- Trans Fat: 0 g
- Carbohydrates: 22 g
- Fiber: 0.5 g
- Protein: 6 g
- Cholesterol: 90 mg
Keywords: Cotton Candy Cheesecake, colorful cheesecake, whimsical dessert, creamy cheesecake, cotton candy flavor, party dessert, pastel cheesecake