How to Make Perfect Homemade Buns Easily
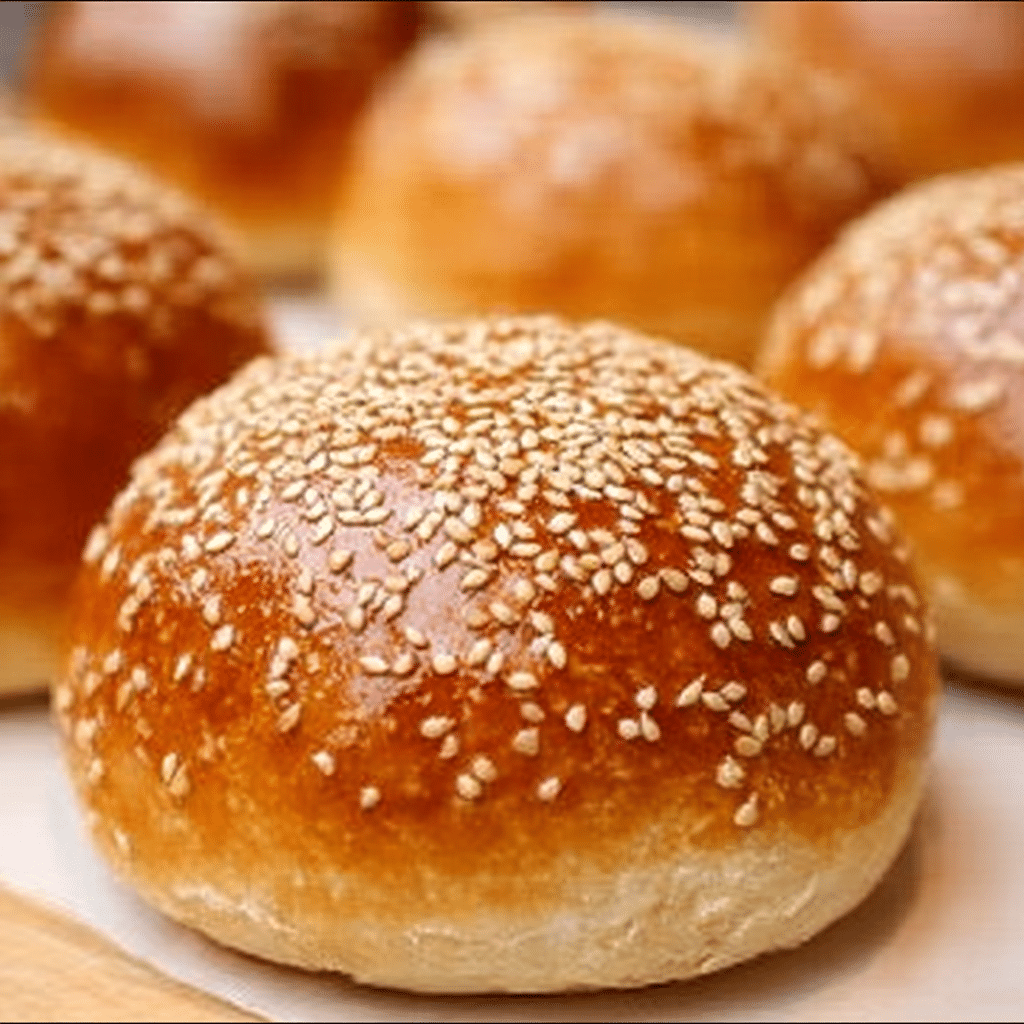
If you’ve ever wanted to bake soft, fluffy, and absolutely delicious buns right in your own kitchen, you’re in the right place. This guide on how to make perfect Homemade Buns easily will take you through a foolproof recipe that guarantees tender buns with a golden crust every time. Whether you’re planning burgers, breakfast sandwiches, or a cozy snack, these homemade buns bring fresh warmth and that fresh-baked aroma that no store-bought option can match.
Why You’ll Love This Recipe
- Effortless baking: Simple steps that beginners can follow without stress or confusion.
- Soft and fluffy texture: Achieve bakery-worthy buns with a tender crumb and airy feel.
- Versatile use: Perfect for burgers, sliders, breakfast sandwiches, and more.
- Customizable flavor: Easily add herbs, seeds, or spices to suit your taste.
- Affordable ingredients: Uses pantry staples with no need for expensive specialty flours or additives.
Ingredients You’ll Need
The beauty of these Homemade Buns lies in their simple yet essential ingredients. Each component plays a key role in taste, texture, and color, resulting in buns that rise perfectly and have that irresistible softness.
- Flour: All-purpose flour provides the right gluten structure for soft, elastic dough.
- Yeast: Active dry yeast or instant yeast helps the buns rise, making them fluffy.
- Sugar: Adds subtle sweetness and encourages yeast activation.
- Salt: Enhances flavor and balances the sweetness.
- Milk: Warm milk hydrates the dough and enriches flavor and softness.
- Butter: Adds richness and a tender crumb.
- Egg: Provides structure and helps create that beautiful golden crust.
- Water: Keeps the dough hydrated and aids in yeast fermentation.
Variations for Homemade Buns
Feel free to customize this Homemade Buns recipe to match your mood or dietary preferences. It’s easy to swap ingredients or add flavors to create unique buns every time you bake.
- Whole wheat twist: Substitute half the all-purpose flour with whole wheat for a nuttier flavor and healthier option.
- Herb-infused: Add fresh or dried rosemary, thyme, or basil for a fragrant bun perfect with savory fillings.
- Seeded tops: Sprinkle sesame seeds, poppy seeds, or flaxseeds on top before baking for extra texture and visual appeal.
- Vegan version: Replace milk with plant-based milk and butter with vegan margarine; skip the egg or use a flax egg.
- Sweet buns: Increase sugar slightly and fold in raisins, cinnamon, or chocolate chips for a sweet twist.

How to Make Homemade Buns
Step 1: Activate the Yeast
Warm your milk and water to about 110°F (43°C). Combine with yeast and a pinch of sugar, then let it sit for 5 to 10 minutes until foamy. This ensures the yeast is alive and ready to give your buns the perfect rise.
Step 2: Mix the Dough
In a large bowl, whisk together the flour, remaining sugar, and salt. Add the yeast mixture, beaten egg, and softened butter, then stir to combine until a dough begins to form. Transfer it to a floured surface and knead for about 8 to 10 minutes until smooth and elastic.
Step 3: First Rise
Place the dough in a lightly greased bowl, cover with a clean kitchen towel or plastic wrap, and let it rise in a warm spot for about 1 to 1.5 hours, or until doubled in size.
Step 4: Shape the Buns
Punch down the dough gently to release air bubbles. Divide it into equal portions (about 8 to 12 pieces), and roll each into a smooth ball. Arrange them spaced apart on a parchment-lined baking sheet.
Step 5: Second Rise
Cover the shaped buns loosely and let them rise again for 30 to 45 minutes until puffy.
Step 6: Bake to Perfection
Preheat your oven to 375°F (190°C). Brush the buns with an egg wash (one beaten egg with a splash of water) for a shiny golden crust. Bake for 15 to 20 minutes or until buns are deep golden and sound hollow when tapped on the bottom.
Pro Tips for Making Homemade Buns
- Proper temperature: Milk and water should be warm but not hot; too hot can kill the yeast.
- Knead thoroughly: Develop the gluten for a strong dough that traps air and results in fluffy buns.
- Use fresh yeast: Check expiration dates for the best rise.
- Don’t rush rising: Let the dough double in size for full flavor and texture development.
- Use an egg wash: It gives your buns that appealing golden and shiny top.
- Cool completely: Let buns cool on a wire rack to avoid sogginess from steam.
How to Serve Homemade Buns
Garnishes
Sprinkle sesame or poppy seeds on top before baking, or after baking, add a light brushing of melted butter for extra shine and flavor. You could also cut buns and spread flavored butters or herb mayonnaise for immediate enjoyment.
Side Dishes
Homemade buns pair wonderfully with hearty soups, creamy coleslaw, crispy fries, or fresh salad greens, making any meal feel complete and satisfying.
Creative Ways to Present
Turn your homemade buns into slider platters with mini burger patties and colorful toppings, or slice them horizontally and toast for breakfast sandwiches with eggs, cheese, and bacon.
Make Ahead and Storage
Storing Leftovers
Store leftover Homemade Buns in an airtight container or resealable bag at room temperature for up to 2 days while maintaining softness.
Freezing
Freeze cooled buns individually wrapped in plastic wrap and placed in a freezer bag for up to 2 months, perfect for quick thaw-and-toast meals later.
Reheating
Thaw frozen buns at room temperature, then warm in a preheated oven at 300°F (150°C) for 5 to 7 minutes to refresh softness and crisp up the crust slightly.
FAQs
Can I use instant yeast instead of active dry yeast?
Yes! Instant yeast works wonderfully and can be mixed directly with dry ingredients without proofing first, but activating it with warm liquid also helps ensure a good rise.
What can I do if my dough is too sticky?
Add flour one tablespoon at a time during kneading until it’s manageable but still soft; avoid adding too much or buns may become dense.
How do I know when the buns are fully baked?
They should be golden brown on top and sound hollow when tapped on the bottom, which signals that the interior is baked through.
Can I skip the egg in the dough?
Yes, but the egg contributes to structure, richness, and color. Skipping it may result in slightly less tender buns with a paler crust.
Is it okay to use water instead of milk?
Water can be used but milk enriches the dough for softer texture and better flavor, so it’s recommended for best results.
Final Thoughts
Making Homemade Buns is easier than you might think, and the reward is pure joy: warm, fresh buns that are soft, fluffy, and full of comfort. Give this recipe a try, customize it your way, and soon you’ll be impressing family and friends with bakery-level buns straight from your oven.
Related Posts
- Best Smoked Paprika Chicken Smash Burgers Now
- Best Chicken Caesar Sandwich Recipes to Try Now
- How to Make Cheesy Garlic Chicken Wraps Fast
Homemade Buns
This Homemade Buns recipe guides you through making soft, fluffy, and delicious buns with a tender crumb and golden crust. Perfect for burgers, breakfast sandwiches, or snacks, these buns are made from simple pantry staples and can be easily customized to suit any flavor preference or dietary need.
- Prep Time: 25 minutes
- Cook Time: 20 minutes
- Total Time: 2 hours 5 minutes
- Yield: 8 to 12 buns 1x
- Category: Appetizers
- Method: Baking
- Cuisine: American
- Diet: Vegetarian
Ingredients
Basic Ingredients
- 3 ½ cups all-purpose flour
- 2 ¼ tsp active dry yeast (or instant yeast)
- 2 tbsp sugar
- 1 tsp salt
- ½ cup warm milk (about 110°F / 43°C)
- ½ cup warm water (about 110°F / 43°C)
- 1 large egg, beaten
- 4 tbsp unsalted butter, softened
Instructions
- Activate the Yeast: Warm the milk and water to about 110°F (43°C). Combine with yeast and a pinch of sugar, then let it sit for 5 to 10 minutes until foamy, ensuring the yeast is active for a perfect rise.
- Mix the Dough: In a large bowl, whisk together the flour, remaining sugar, and salt. Add the yeast mixture, beaten egg, and softened butter. Stir until a dough begins to form, then transfer to a floured surface and knead for 8 to 10 minutes until smooth and elastic.
- First Rise: Place the dough in a lightly greased bowl, cover with a clean kitchen towel or plastic wrap, and let rise in a warm spot for 1 to 1.5 hours, or until doubled in size.
- Shape the Buns: Gently punch down the dough to release air bubbles. Divide into 8 to 12 equal portions and roll each into a smooth ball. Arrange the buns on a parchment-lined baking sheet, spaced apart.
- Second Rise: Cover the shaped buns loosely and let rise again for 30 to 45 minutes until puffy.
- Bake to Perfection: Preheat oven to 375°F (190°C). Brush buns with an egg wash made from one beaten egg and a splash of water. Bake for 15 to 20 minutes until deep golden and hollow sounding when tapped.
Notes
- Use milk and water warmed to about 110°F, not hotter, to keep yeast alive.
- Knead dough thoroughly for a strong gluten structure that traps air and creates fluffy buns.
- Verify yeast freshness to achieve the best rise.
- Allow dough to fully double in size to develop flavor and texture.
- Applying an egg wash creates a shiny, golden crust.
- Cool buns completely on a wire rack to prevent sogginess from steam.
Nutrition
- Serving Size: 1 bun
- Calories: 160
- Sugar: 3g
- Sodium: 170mg
- Fat: 5g
- Saturated Fat: 3g
- Unsaturated Fat: 2g
- Trans Fat: 0g
- Carbohydrates: 24g
- Fiber: 1g
- Protein: 5g
- Cholesterol: 40mg
Keywords: homemade buns, soft buns, fluffy buns, bread buns, baking buns, burger buns, breakfast sandwich buns, easy buns, bakery-style buns